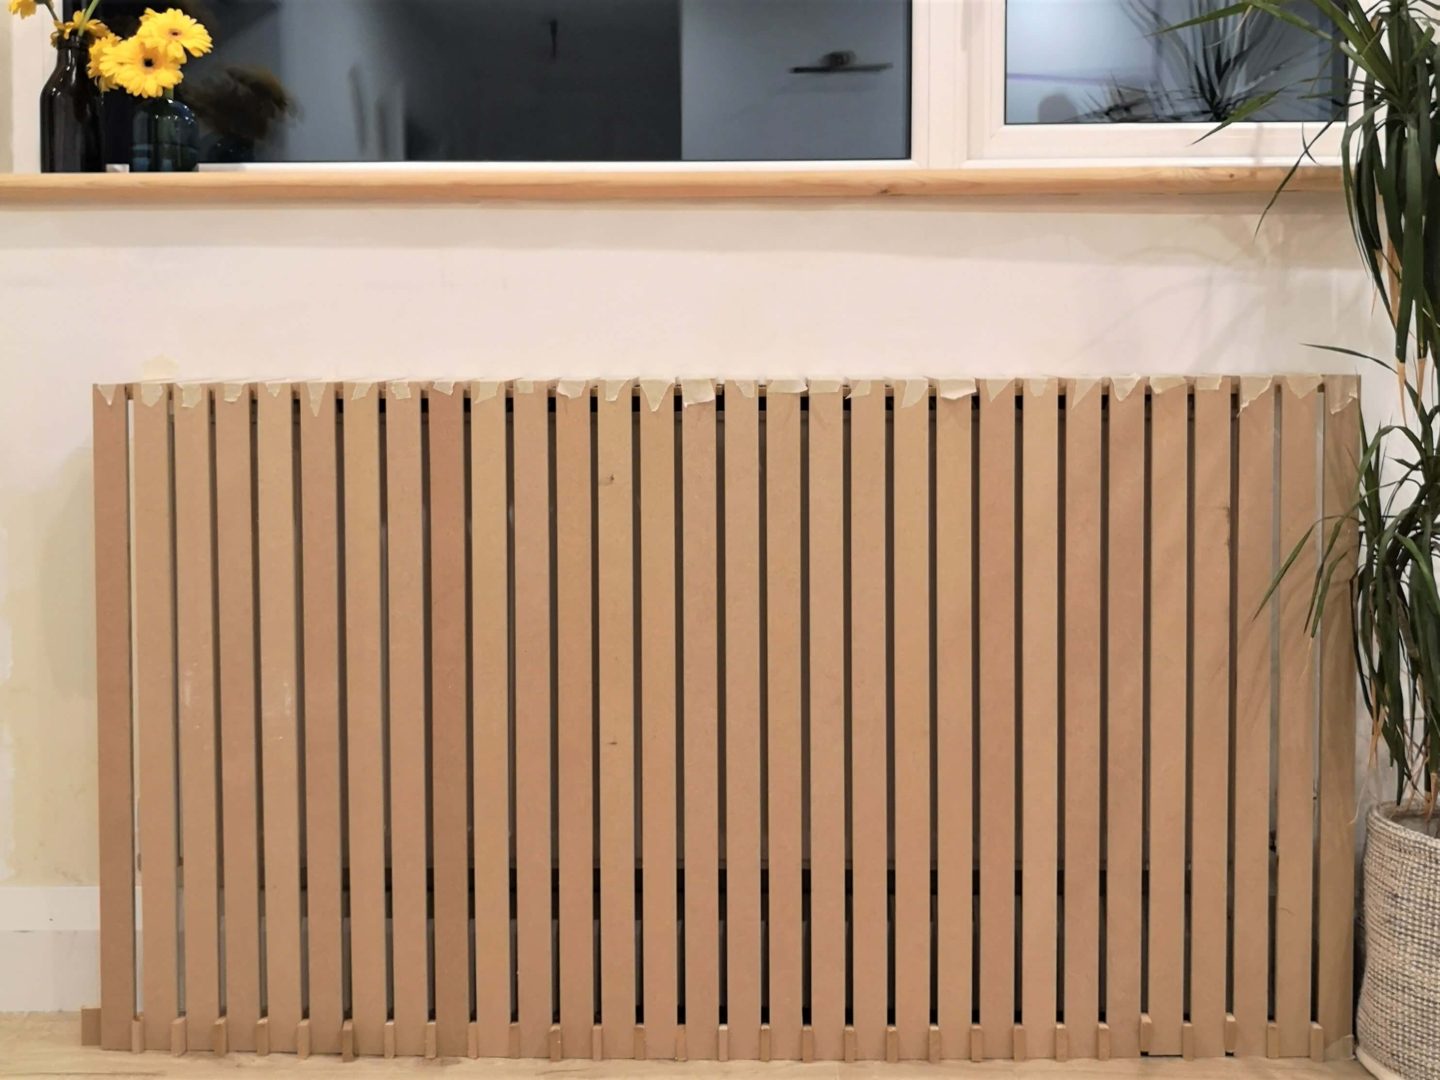
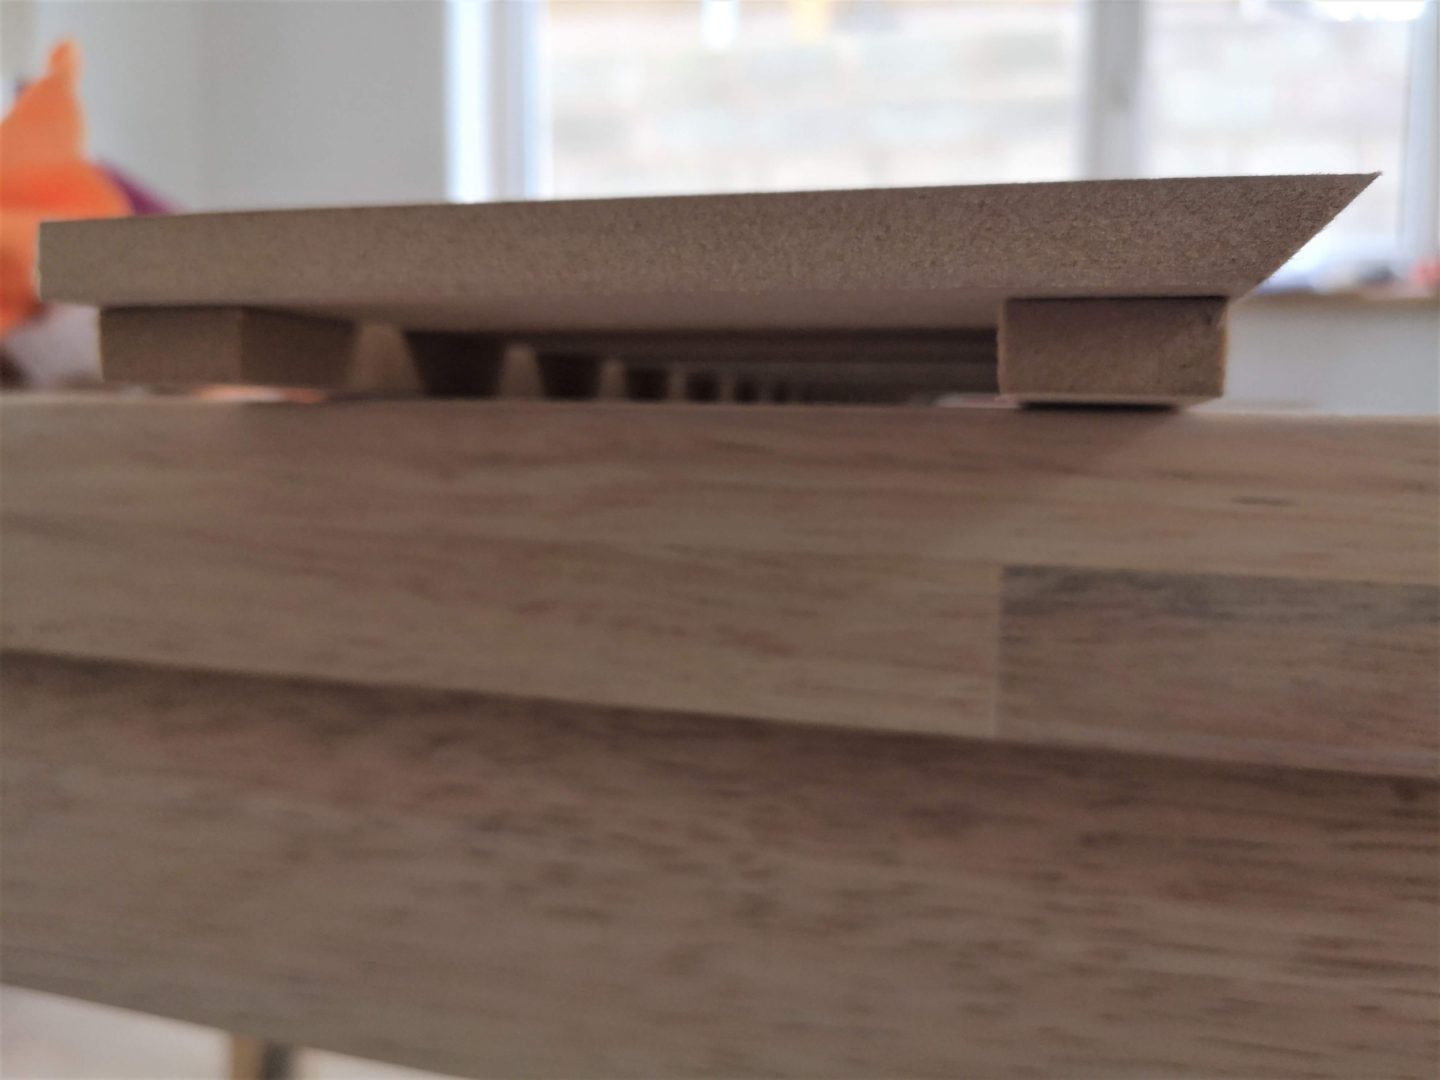
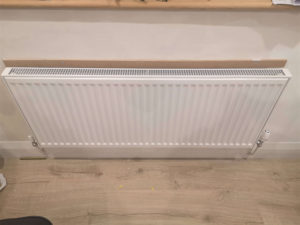
There’s not a lot you can buy these days for 20 quid, but you can MAKE YOUR OWN RADIATOR COVERS!!! We installed these radiators last year and we’ve noticed how great they are at heating the house quickly. So, it was really important that I figure out a way to hide their ugliness, while letting the heat out! I came across this slatted radiator cover on @mishkashoe and I simplified it even further. In the above photo, the glued hasn’t even dried yet, hence why the masking tape and spacers are still in place. But I was too excited today not to share it!!!
Planning
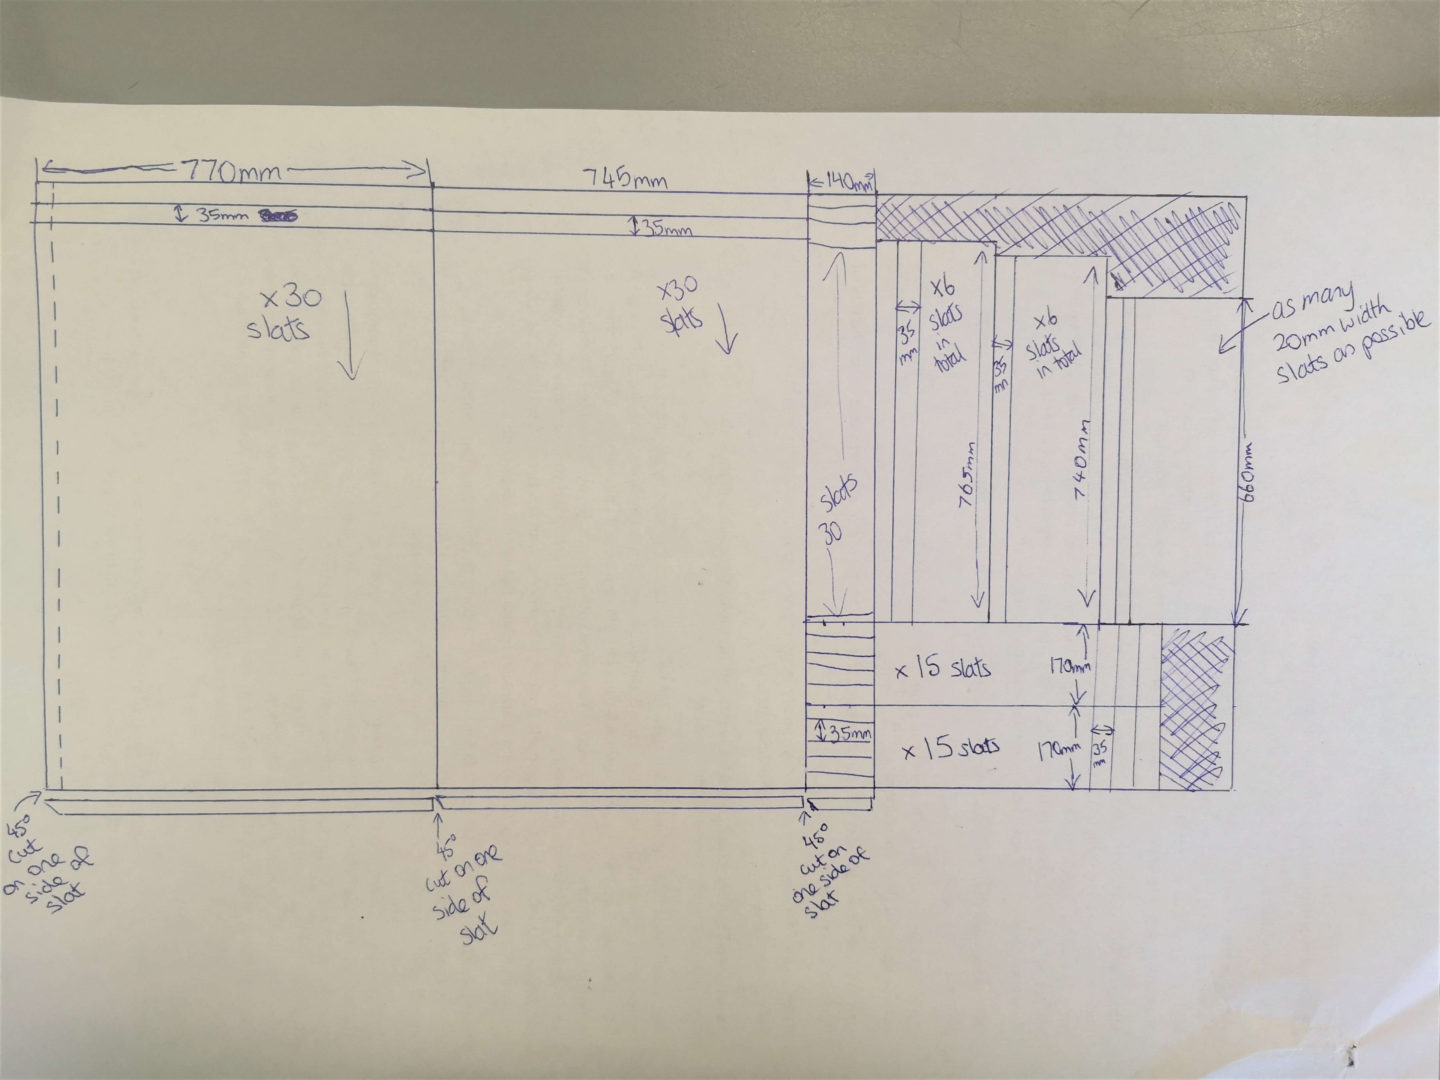
Firstly, when figuring out the best sizes for everything I made sure that when the cover was built, it would be 3cm away from the top and front of the radiator. And also, that it would be 5cm away from each side. I decided to have each slat 35mm in width with a spacing of 9mm between each slat. I chose 9mm as I could use a piece of leftover MDF as a spacer. Once I had my measurements, I got to planning how to cut.
I designed the cover so that the short slats and the longer slats meet at a 45degree angle. It makes for a nice clean finish, especially when using MDF. I used one sheet of 9mm MDF for the two radiator covers and it took a while to figure out the best way to cut the slats so that they would all fit in. Maths is not my forte! On the chance that this helps you, below was my final plan.
The Start Didn’t Go Well
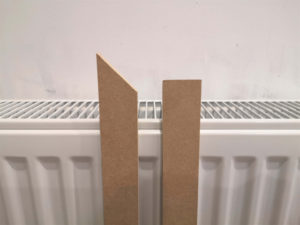
A friend of mine with a table saw, very kindly, cut the board into slats and even though I was standing right next to him, I didn’t notice that the angles were cut the wrong way until I got home. It was an absolute disaster to be honest and entirely my fault! I did come up with a solution of cutting off the wrong angle and adding trim to the top and bottom. But in the end, we recut them. (I say we, but it was 100% him! 😉
Step 1
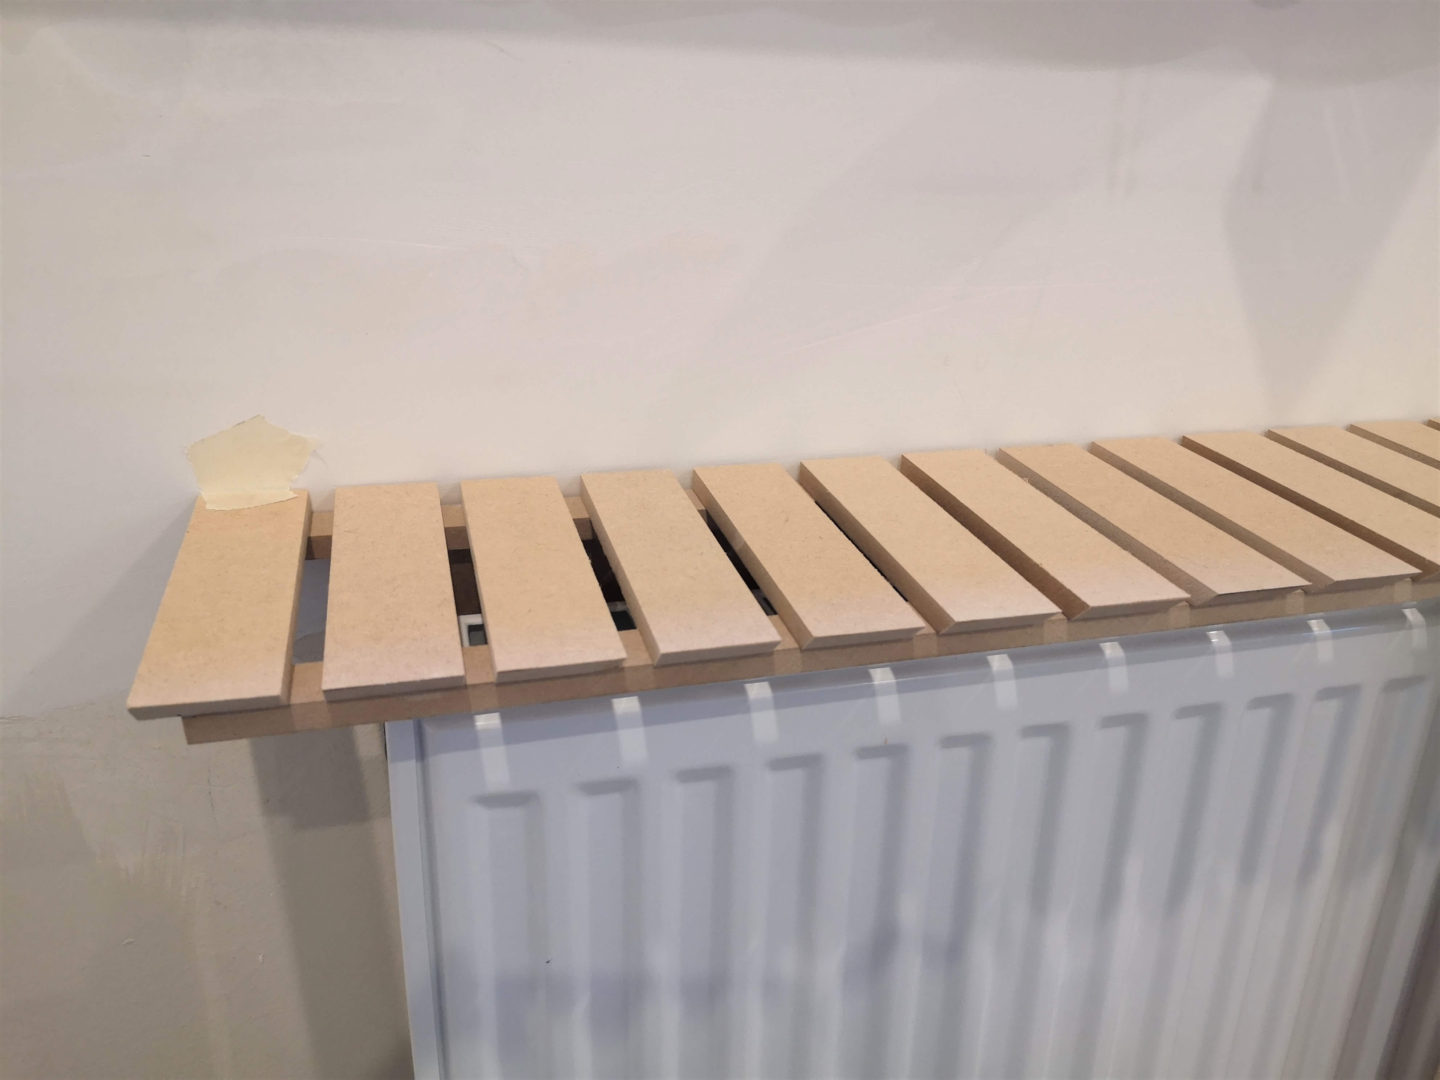
To begin with, I glued a row of shorter slats to two lengths of MDF, making sure I left enough room near the angled side so that the longer slats will sit in place correctly. I also made sure that both end pieces were ‘hanging’ slightly past the MDF. This was to make sure the longer, side slats had enough room to slot under into place. I used liquid glue for this, wiping off any excess regularly. I also used a spare piece of MDF as a spacer between all the slats to give a nice uniform look.
Step 2
While that dried, I attached a support board to the wall. Don’t forget that the top of the radiator cover must hang 3cms above, so keep that in mind when positioning this support board. The plan is to glue the top of the cover to this board, but that will be in the final step.
Step 3
Using boards underneath, I balanced the top row on the radiator in the exact position where it will hang. This is to measure the length of the longer slats so that they just touch the ground. My floor is a bit uneven, so unfortunately for me I had to measure each slat individually for the precise length. Cut the boards and glue them on using the liquid glue. I placed slats on the sides of the radiators too. I slotted these under the top row of slats, so they didn’t need any 45° angle, just a straight edge.
Step 4
Wait for everything to dry and glue the radiator cover to the support board. Or you can be like us and wait to ensure the radiator covers don’t interfere with heating the house. In a few weeks, when I’ve proven to Trevor that it works perfectly, I’ll glue it on. Check back here for an update on that!
Step 6
The final step will be painting them. The most important step, before you paint, is to prime the radiator covers with primer specifically for MDF. I used this one. You need to be extra careful on the sides of the MDF where it has been cut as it just soaks up paint/primer. You might need a second coat. As you can see, I haven’t gotten that far yet…but I’ll show you all next week! What colour do you think I’m going to do? My mood board might give you a hint!
Don’t forget to check out the rest of the One Room Challenge participants right here. I’m getting so many ideas and it’s been so motivating having a schedule…I definitely work best under pressure!

Update: Thankfully the radiator covers haven’t affected the heating, so I glued the covers to the slat on the wall using No-Nails glue! Let me know if you give them a try!