
We are in love with our Ikea Pax wardrobes!!! They look amazing and just as importantly, they function really well. I was going to try and write all about them in one post but I’ve decided to split it into two. We must still try to add trim to the edges so I’ll write about that soon. Adding a Pax wardrobe to your room will take time. The planning of it takes time, as does the assembly, but in my opinion well worth it. We bought our wardrobes for just over €800 and it has lots of extra features as you’ll soon see! Follow these steps to get the wardrobes of your dreams!
Step 1


The first picture here is the before shot. The wardrobes were actually on the other side of the room, but we felt that they would look so much better on the opposite wall. Here they would be nestled in between the chimney breast and the wall. We very carefully removed the old wardrobes as we wanted to sell them on. FYI – we did end up selling them for €250 on donedeal.ie so being careful was absolutely worth it! (Click here to read a post about the best ways of getting rid of your unwanted stuff!) As you can see we were left with a few holes, but we patched them up easily enough.
Step 2
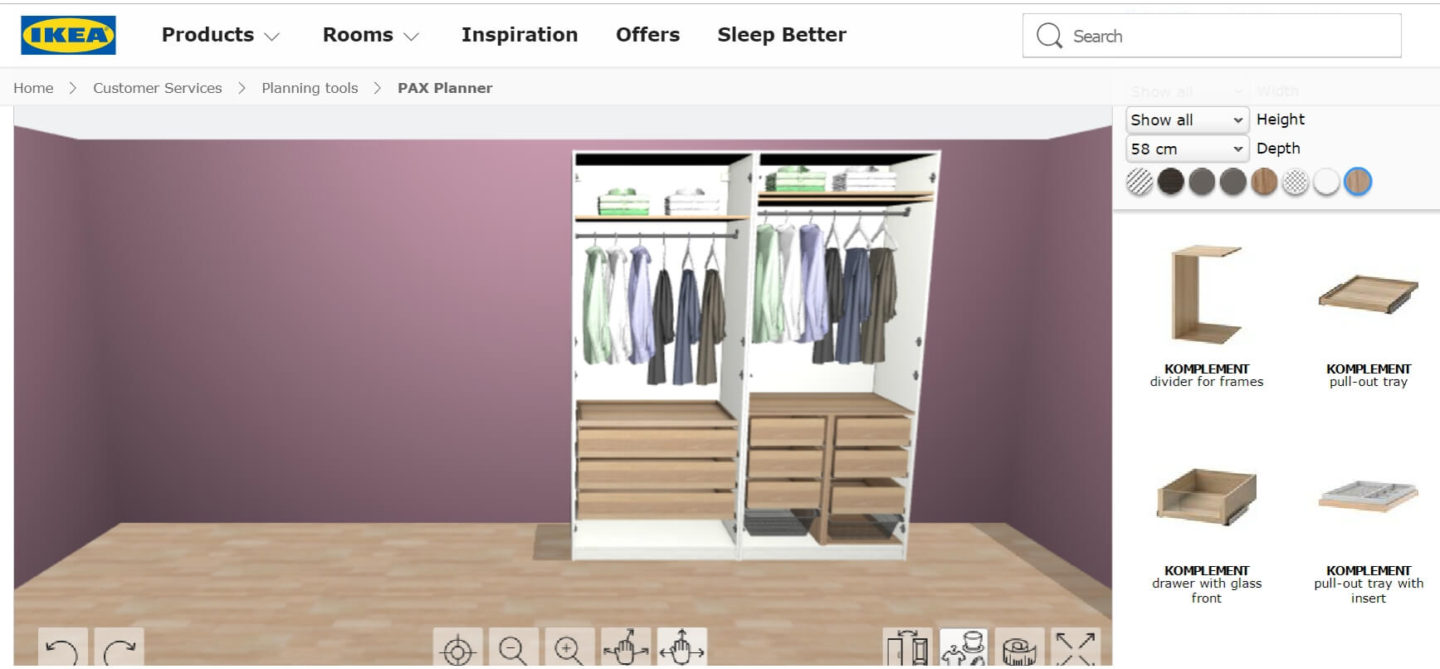

Did you know there are planning tools on the Ikea website to design so many areas of your house??!! The kitchen, bathroom, lots of different storage systems and even your couch! Click here for a list of them all. The Ikea Pax online planner is fantastic! It’s very easy to use, though it can sometimes be a bit slow – make sure to save frequently just in case!
You can create your room in 3D, even adding wall paint and floors if you want! As you add bits and pieces to your wardrobe you will be able to see the total cost at all times. There are lots of internal options to choose from. As you can see above we went with shelves on top, but we put them at different heights as I knew I wanted to put bags on top while Trevor wanted a shelf that was much higher.
Step 3
We added motion sensor lights which we put under these shelves and we love them!!!!! They have a warm, soft glow that isn’t too strong, so it wouldn’t wake anyone in the morning if you had to get ready while your other half is still conked!
For the wires, we drilled a hole through the shelf and again through the top of the wardrobe. The lights in both wardrobes were then connected. We were able to plug it all into a socket that was on the wall, along the side of the wardrobe. When we add trim we won’t have access to this plug, but the lights have very good reviews and the bulb are LED so they will hopefully last a very long time! If you are buying lights make sure you have the power supply cord, the connection cord and these cables cover strips. Below is a picture of how much tidier everything looks when you drill the holes and add the cover strips.

Before 
After
I noticed, in the Ikea showroom, some dark scratches on the white railings. I think these were caused by moving hangers. So we chose grey hanging railings. Hopefully then, if we do have scratches, they wouldn’t be noticeable.
We fold a lot of our clothes so we bought pull out drawers with soft-close hinges. I’m feeling very fancy right about now!! 🙂 They hold so much and because they are pull out, everything is really easy to get out. When you place things in the wardrobe on the planner, it will tell you if your item is in the way of anything else, e.g. It wouldn’t let me put the drawers at the very bottom as the hinges were in the way. I think this was a brilliant feature and it really made me confident that I was planning correctly.
Step 4
Double check your shopping list at the end. If you want, you can go into an Ikea store and one of staff members can check your order to make sure everything is correct. We did this and we found it very helpful. For €89, our wardrobes were delivered the next day, . The delivery man even helped us to bring it upstairs. Regardless of whether you are getting your order delivered or not, I would highly recommend signing up to become an Ikea family member. Enter your membership number when you are ordering and your item in insured against damage during both delivery and assembly.
As a side note, one of out doors had a small mark when we opened the packaging. We emailed Ikea immediately and they replaced the door very quickly and with no fuss!
Step 5


Assembly was pretty straightforward but lengthy and at times stressful. The two of us put it together and it took an entire day. As we bought the taller wardrobe frames, we had to assemble them standing up. This is much harder and I feel you would definitely need a second person to do it, unless you’re a total pro! It took a while to get the wardrobes hanging level to each other. I think this is because our wooden floorboards must be a little uneven. I have a tiny piece of folded cardboard under one of the legs to make it all level! We added these handles and they look so much more expensive than what they were! It was out first time assembling anything as big as that and I would definitely do it again. Well worth it, we love the result!


If you like the look of that artwork, click here to see an entire post I wrote about it!
nice very good news ,thanks
Very nice article.! I love the idea of little lighting inside the wardrobe. Because most roommates get disturbed when you switch on the lights to find out stuff for yourself from the wardrobe.
Author
Thanks so much! Those lights are perfect…just bright enough to see everything!
Hello, Did you have to remove baseboard for this installation. Tobin tobindunnjd@gmail.com
Author
Hi,
Yes, we removed the baseboard behind the wardrobe so that the pax could be pushed back ad sit flush against the wall. We did not remove the baseboards on either side. Hope that helps!
Noreen